Create Objectives (OKRs)
updated 4 months ago
In this article:
How to Create an Objective in Beam
Creating objectives is a fundamental step in goal management. It allows you to set clear targets for personal development, group achievements, or company-wide goals. Our platform offers a streamlined process for creating objectives, either from scratch or by bulk import, and even provides templates to get you started quickly. Here's a step-by-step guide to creating your objectives.
For Admins
Resources:
Step 1: Access the Creation Page
Navigate to the "My Goals" screen.
Click the "Create" button and select "Create Objective."
Step 2: Choose Your Creation Method
You will have two options: "Create from Scratch" and "Bulk Import."
Bulk Import: You can download a CSV template, add your goals, and upload them en masse.
Create from Scratch: Proceed to create your objectives manually.
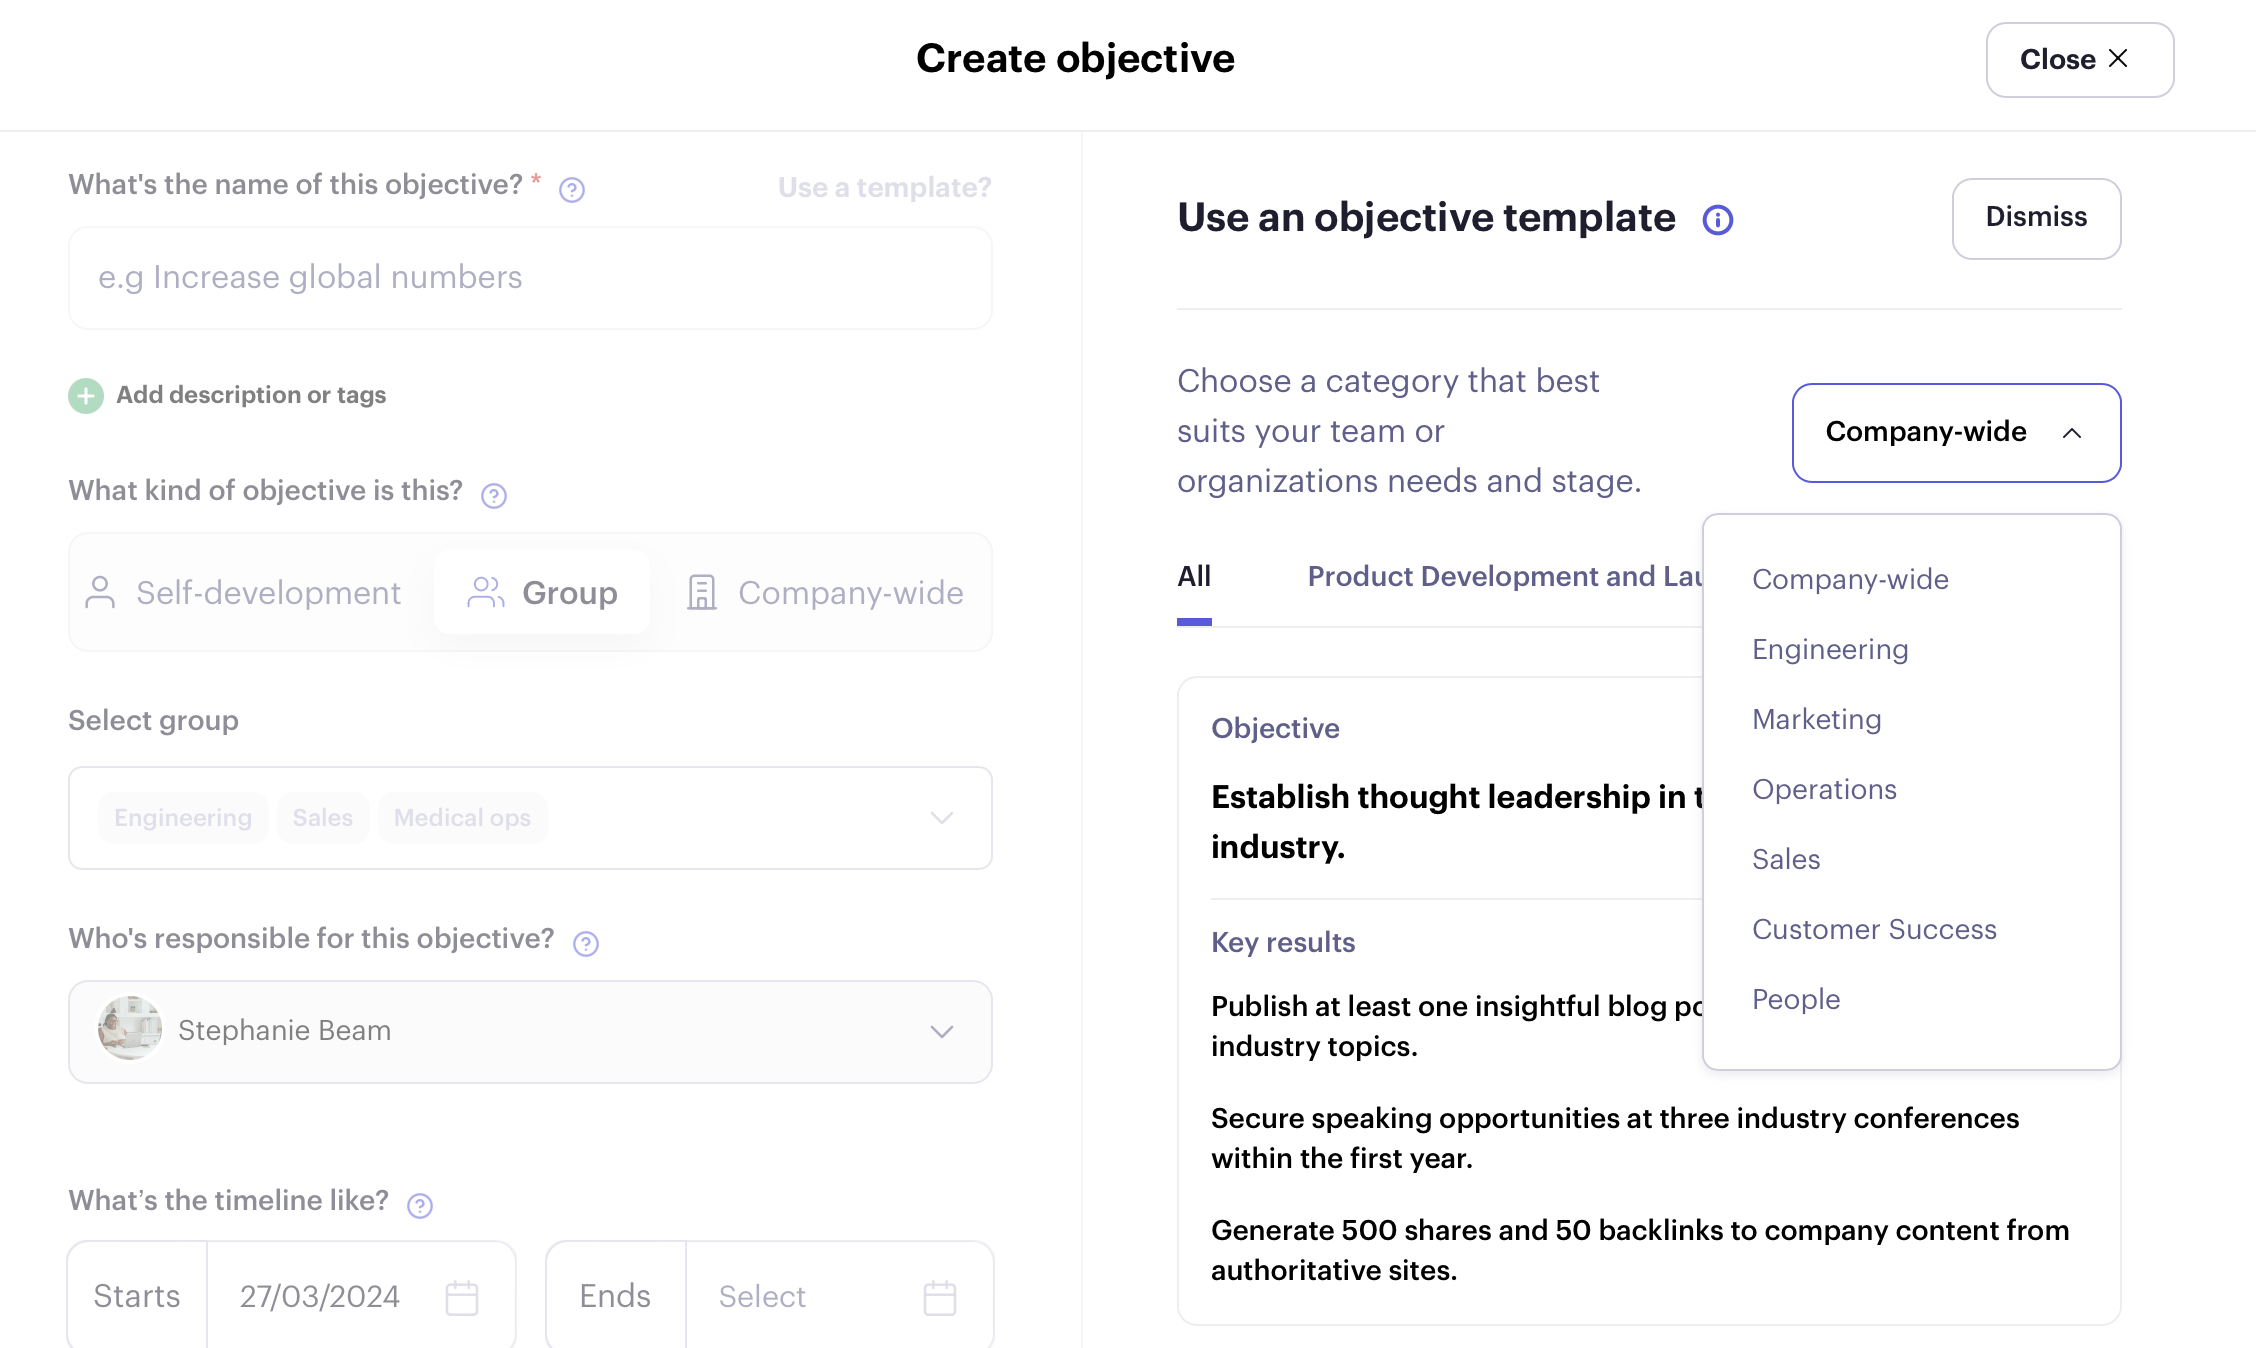
Step 3: Utilise Templates (Optional)
On the "Create Objectives" page, you can use a template. Templates are available for various objectives, including company-wide, engineering, marketing, operations, and more. These templates are designed to help you quickly start creating your objectives.
Step 4: Define Your Objective
1. Enter the Objective's Name: This is a mandatory step.
2. Add a Description (Optional): Provide more details about the objective.

Tip
To create impactful objectives, consider these examples in common categories:
"Recruit & hire phenomenal people to take us to the next level (company growth),"
"Raise the bar on product UX (quality),"
"Sustainable, repeatable lead generation (revenue)."
Avoid less effective objectives like "Interview 5 applicants for Design Lead by April 30," "Increase code coverage to 90%," "Hit 732 ICP leads by the end of Q2," or "Build out accurate job descriptions for 75% of our jobs."
The first set of examples is great because they are time-bound, qualitative, and motivational, while the latter examples are more suitable as key results.
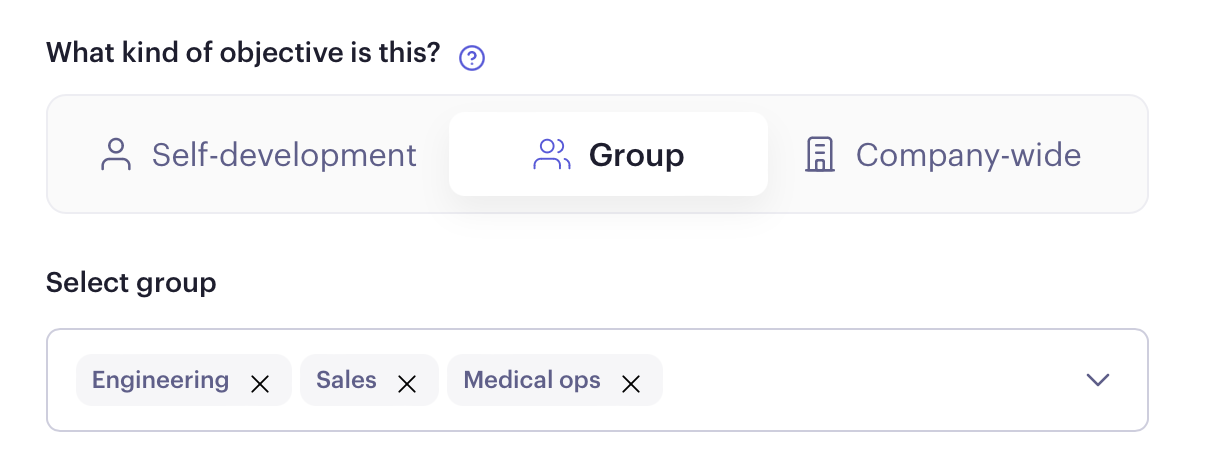
Step 5: Specify the Objective Type
Decide on the type of objective you wish to create: Self-development, Group, or company-wide.
For Group Objectives, you can select up to three groups to associate with the objective.
Step 6: Assign Responsibility
Using the dropdown menu, select who is responsible for the objective. By default, the objective's creator is marked as the owner and responsible party.
Step 7: Set the Timeline
Specify when the objective should start (by default, it starts on the creation date) and when it should end.
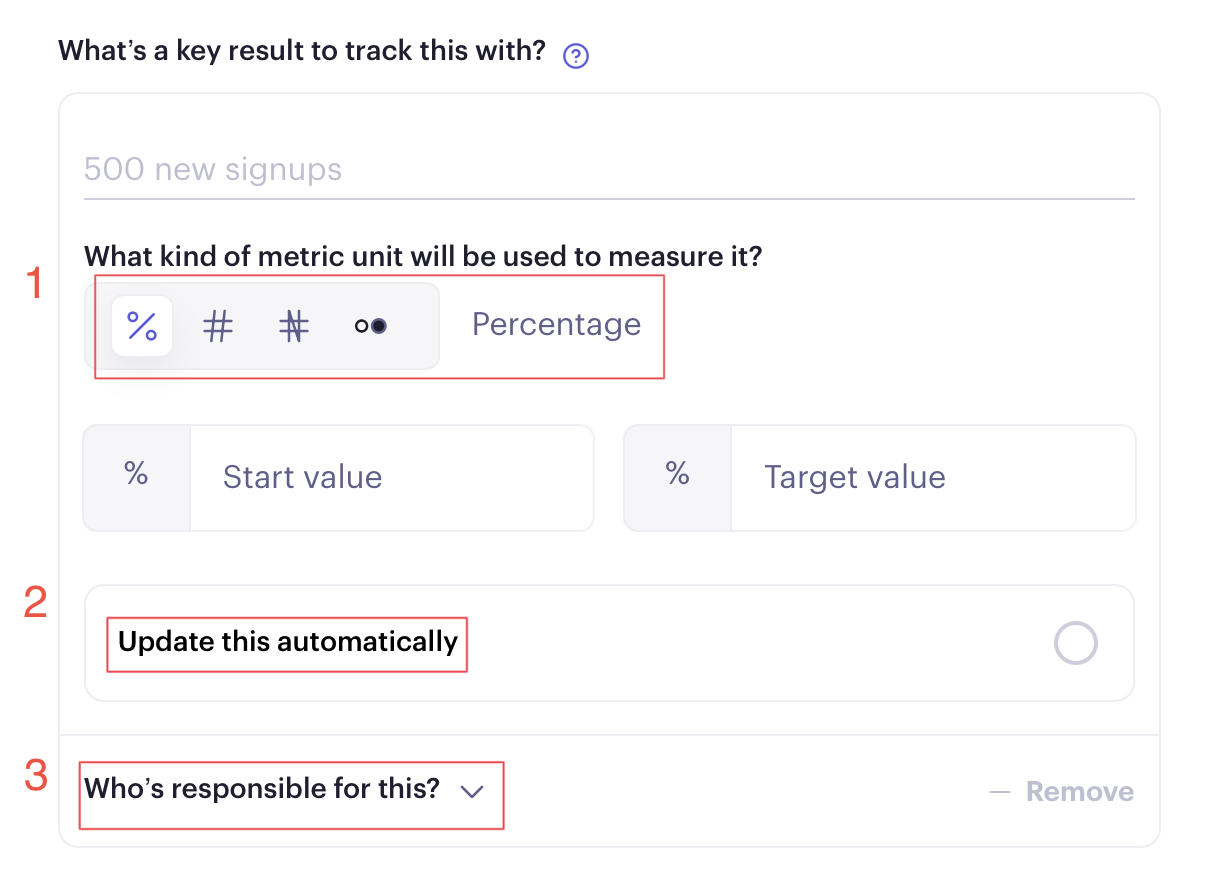
Step 8: Define Key Results
Key results are crucial for tracking the progress of your objective.
Enter the key result's name and select the metric type for measurement (percentages, numbers, currency, complete/not complete). Ensure you add a start value and target value for the key result.
If your company has the integration enabled, you can link key results to any connected apps by clicking "update this automatically".
Assign responsibility for each key result. You can add up to five key results per objective.
Step 9: Publish Your Objective
Once you've filled in all the details and are satisfied with the setup, click "Publish Objective" to complete the process.
Was this article helpful?